How to Paint Light with Your Drone
This is a quick tutorial on how to light paint with your drone.
What was your initial inspiration or thought process for this light painting?
Long story short, I really wanted to do a photo using these about a year ago with a couples engagement session (in West Virginia) and any wedding where we would be out in nature.
Unfortunately, the weather during that engagement session was extremely cold, windy, and we didn’t have enough space to make it work.
I also knew it would require a bit more time and most of my weddings this past year didn’t meet those requirements – so I had to hold it off for a bit.
I really wanted to have snow on the ground and be able to get some stars in the sky.
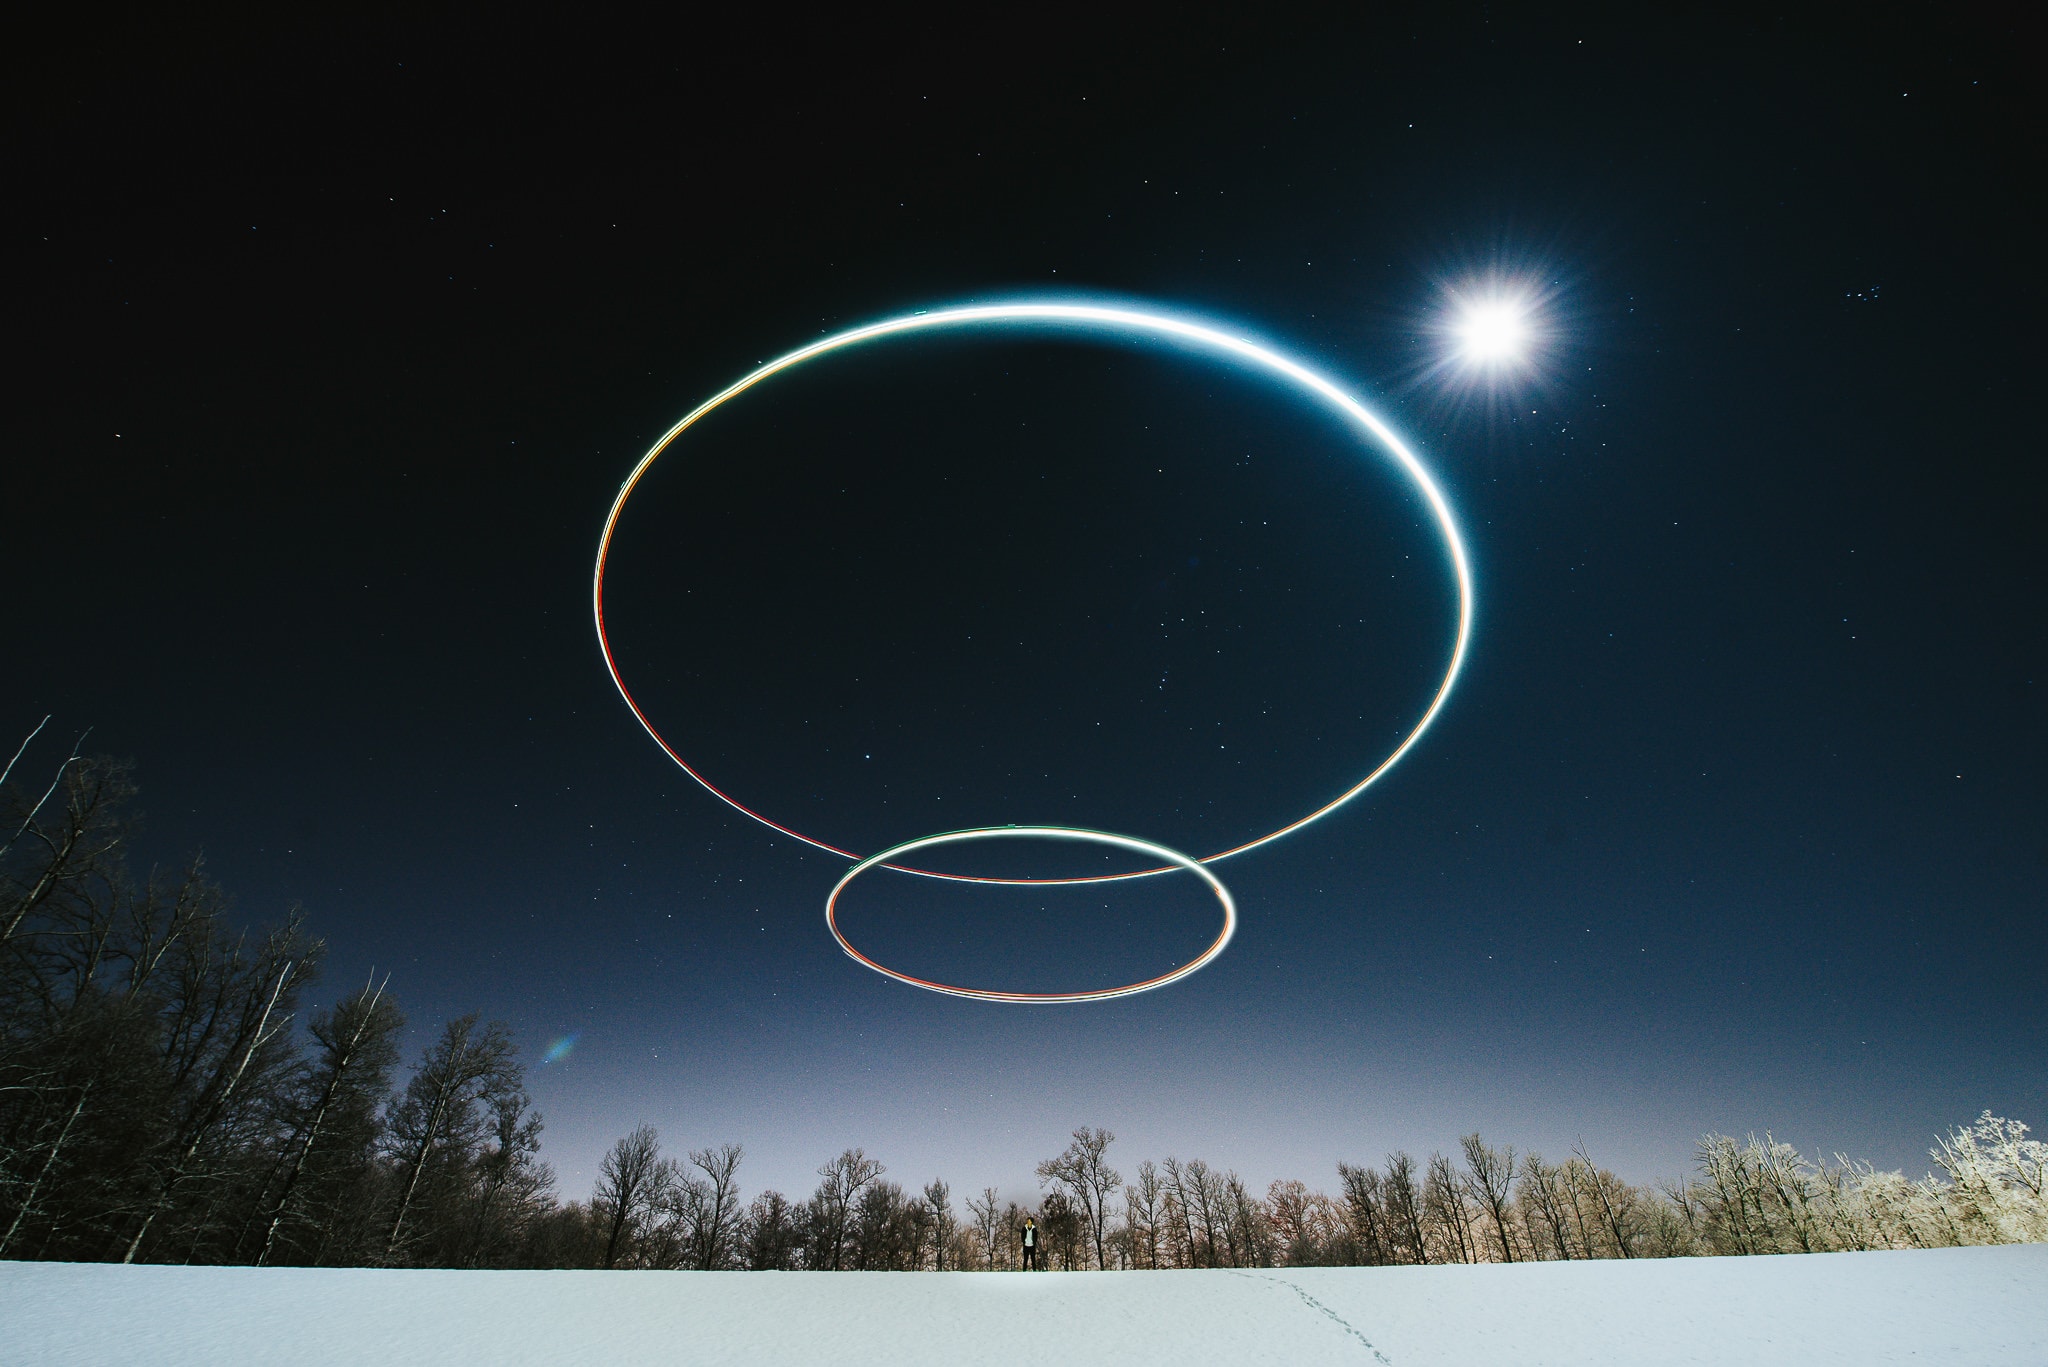
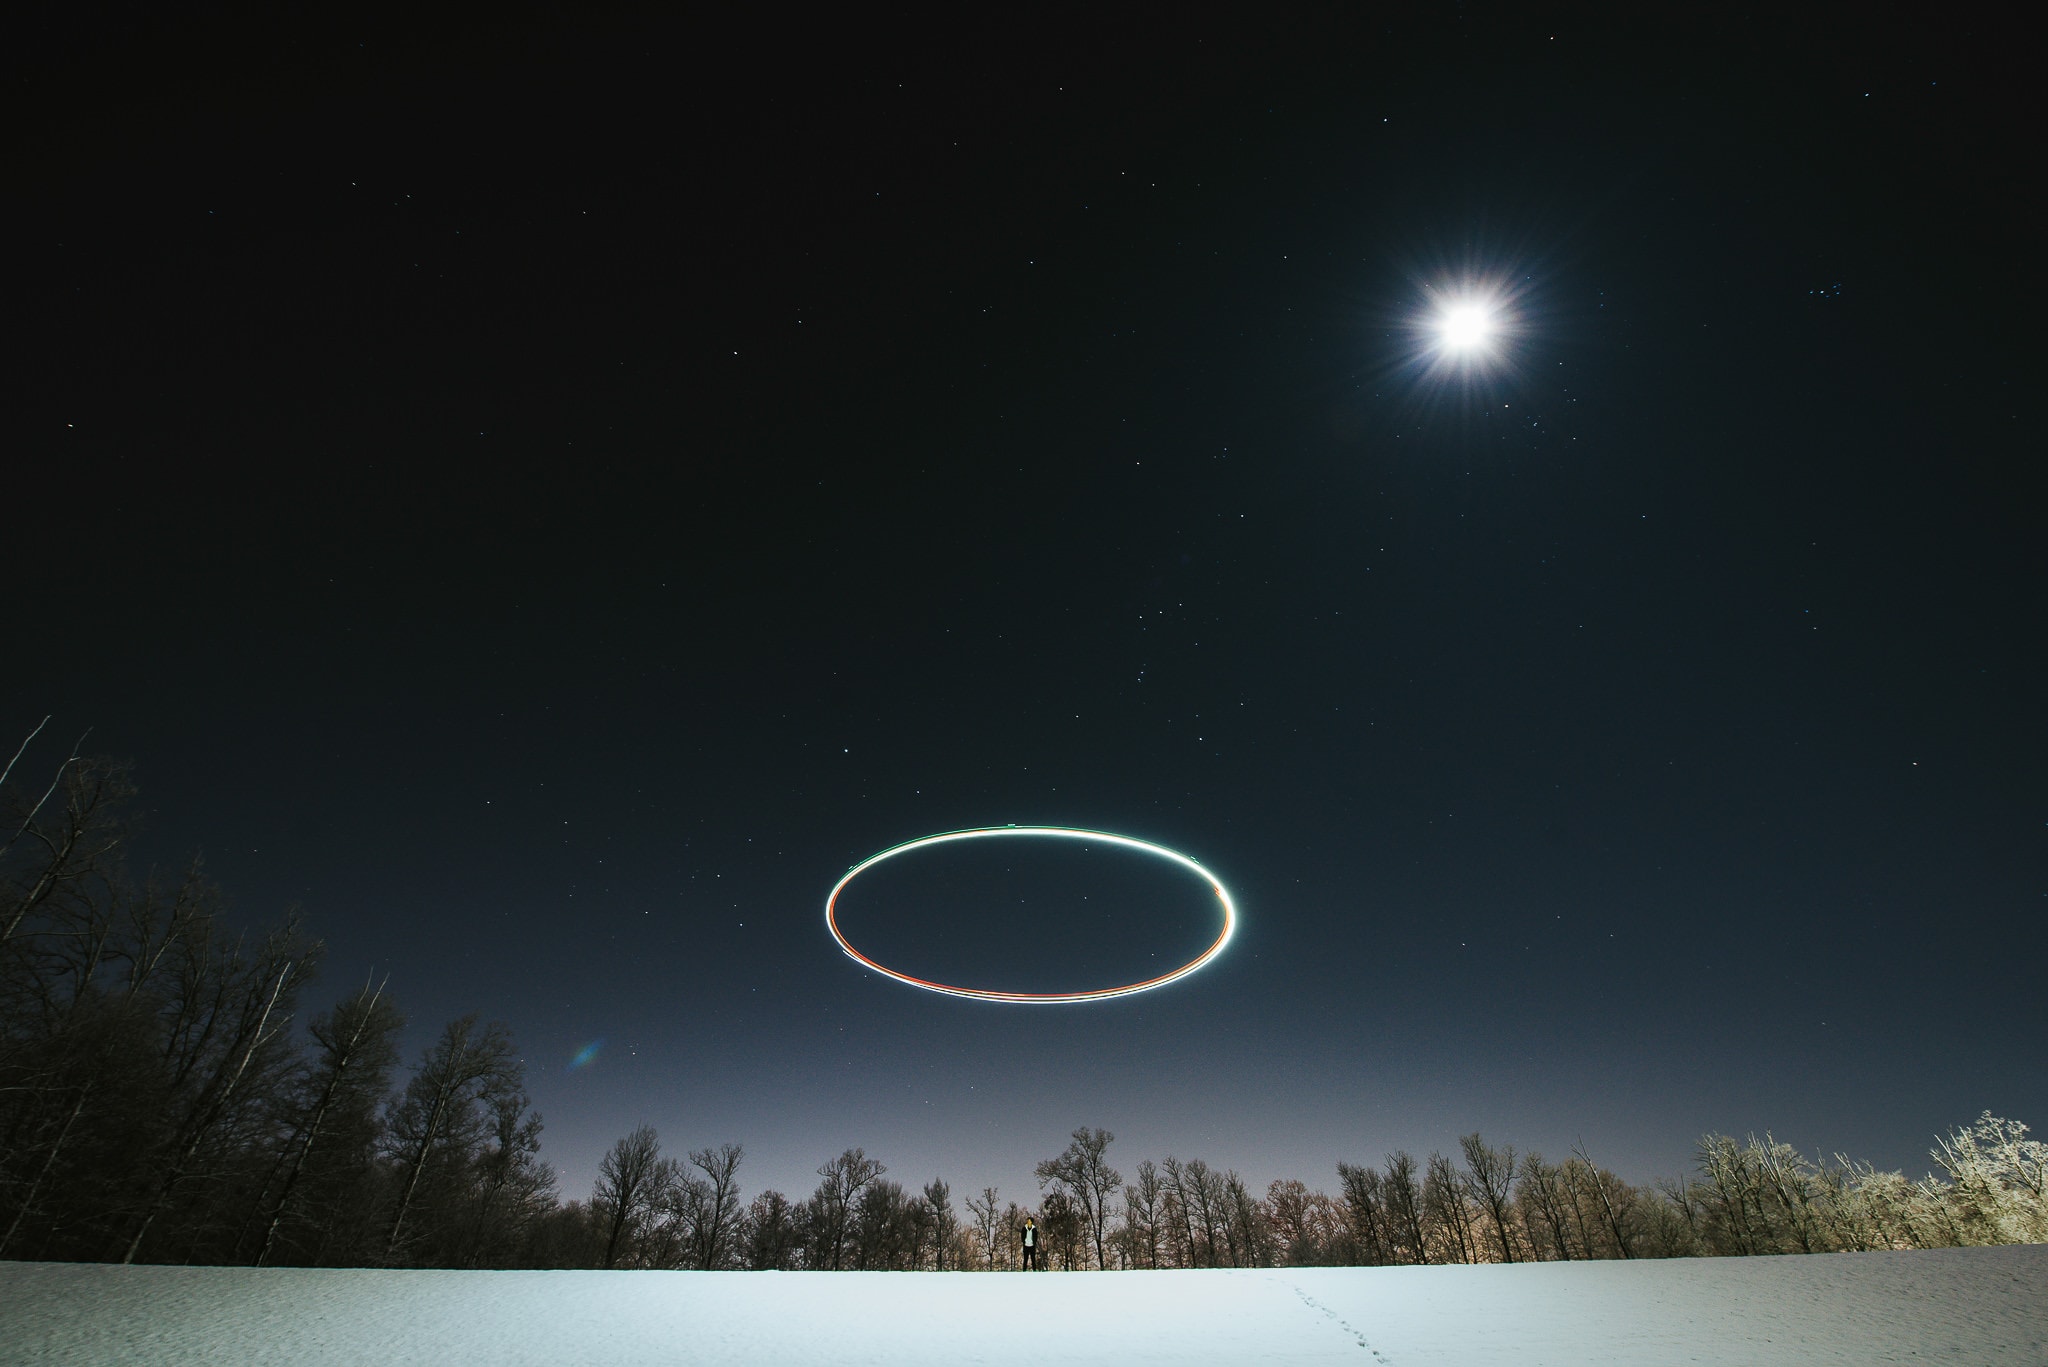
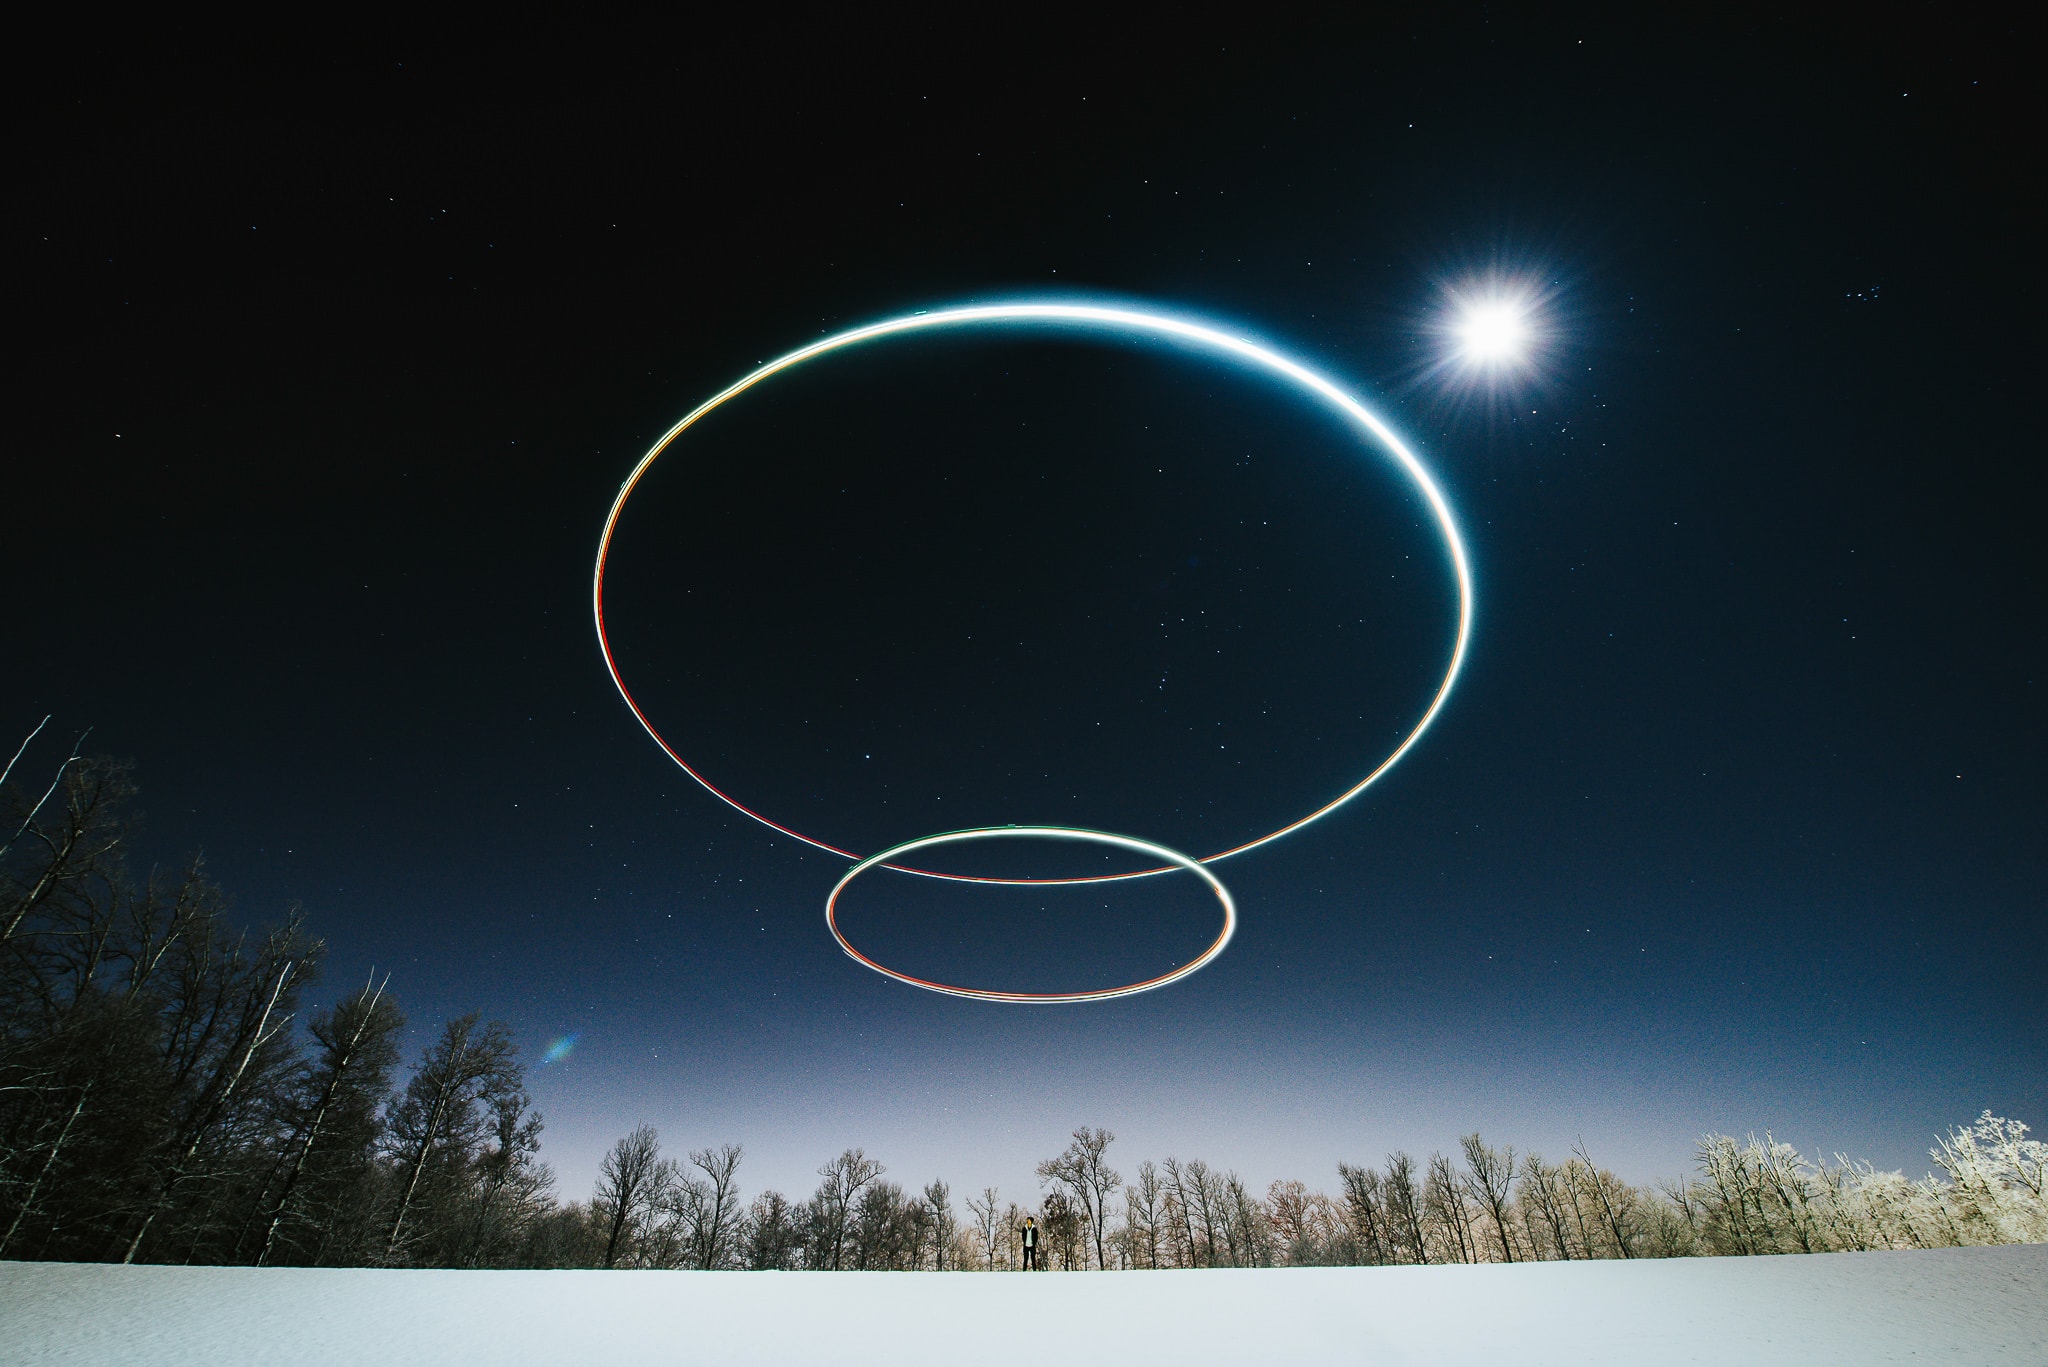
This photo was taken at midnight at a park nearby my place – not ideal, but at least was able to pull it off to some degree.
What is light painting?
Light painting, painting with light, light drawing, or light art performance photography are terms that describe photographic techniques of moving a light source while taking a long exposure photograph, either to illuminate a subject or space, or to shine light at the camera to ‘draw’, or by moving the camera itself during exposure of light sources.
There are many examples of light painting that you have seen before:
A simple Google Search for ‘Light Painting’ will give you an idea of the potential capabilities with long exposures.
I think the fun part of doing light painting photographs is knowing you’re adding in your own light source.
You are able to see how you affect the photo by adding a light(s).
Essentially, you are able to have full creative freedom and, to me, no photo is truly the same.
What is light painting with a drone?
Drone lighting painting, in the most simplistic explanation, is a long exposure photo with the addition of a light source attached to a drone.
So, in essence, you would use the drone to bring the light into the air.
Simple right?
Ehhh… not so much…
There are quite a lot of factors you need to be aware of and take into consideration for drone light painting photography
What equipment do I need to lightpaint with a drone?
A camera where you can change shutter speeds / long exposures
Tripod
Remote trigger for shutter release (not necessary, but highly recommended)
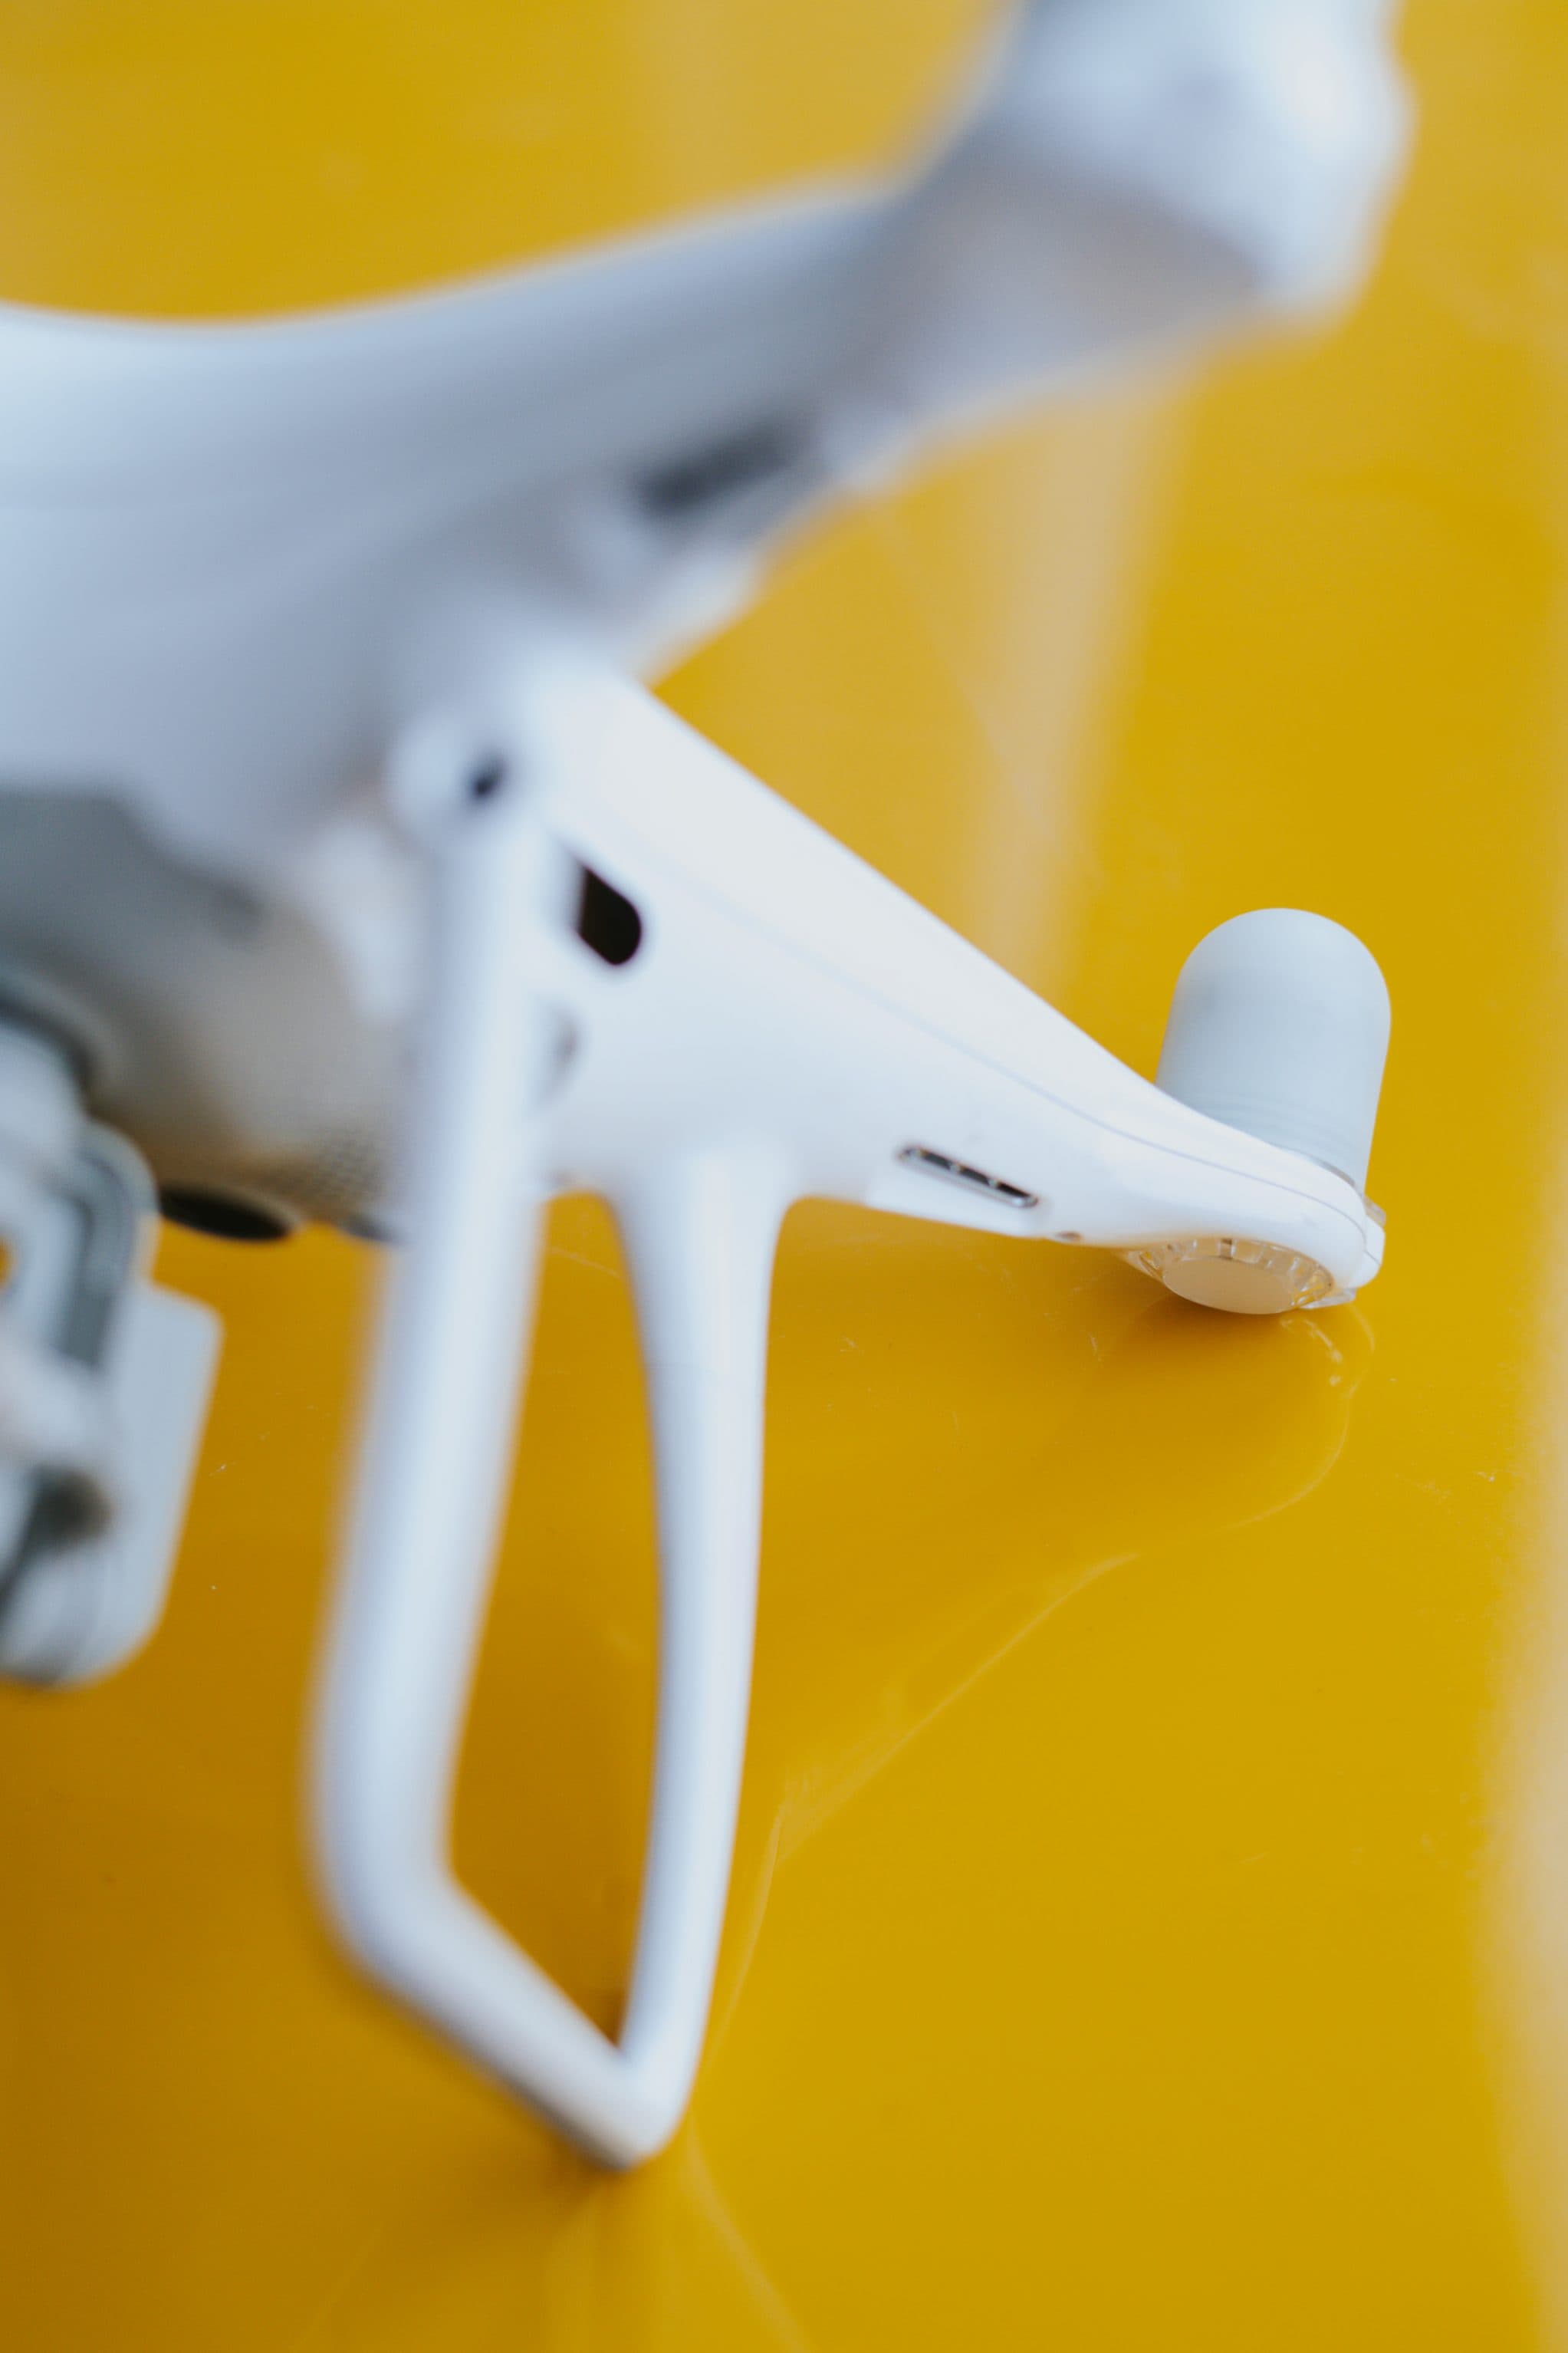
A drone capable of carrying the light that you are planning to use for light painting the landscape.
Drone lights + attachment for light painting.
What is a Lume Cube and why do I need it to lightpaint?
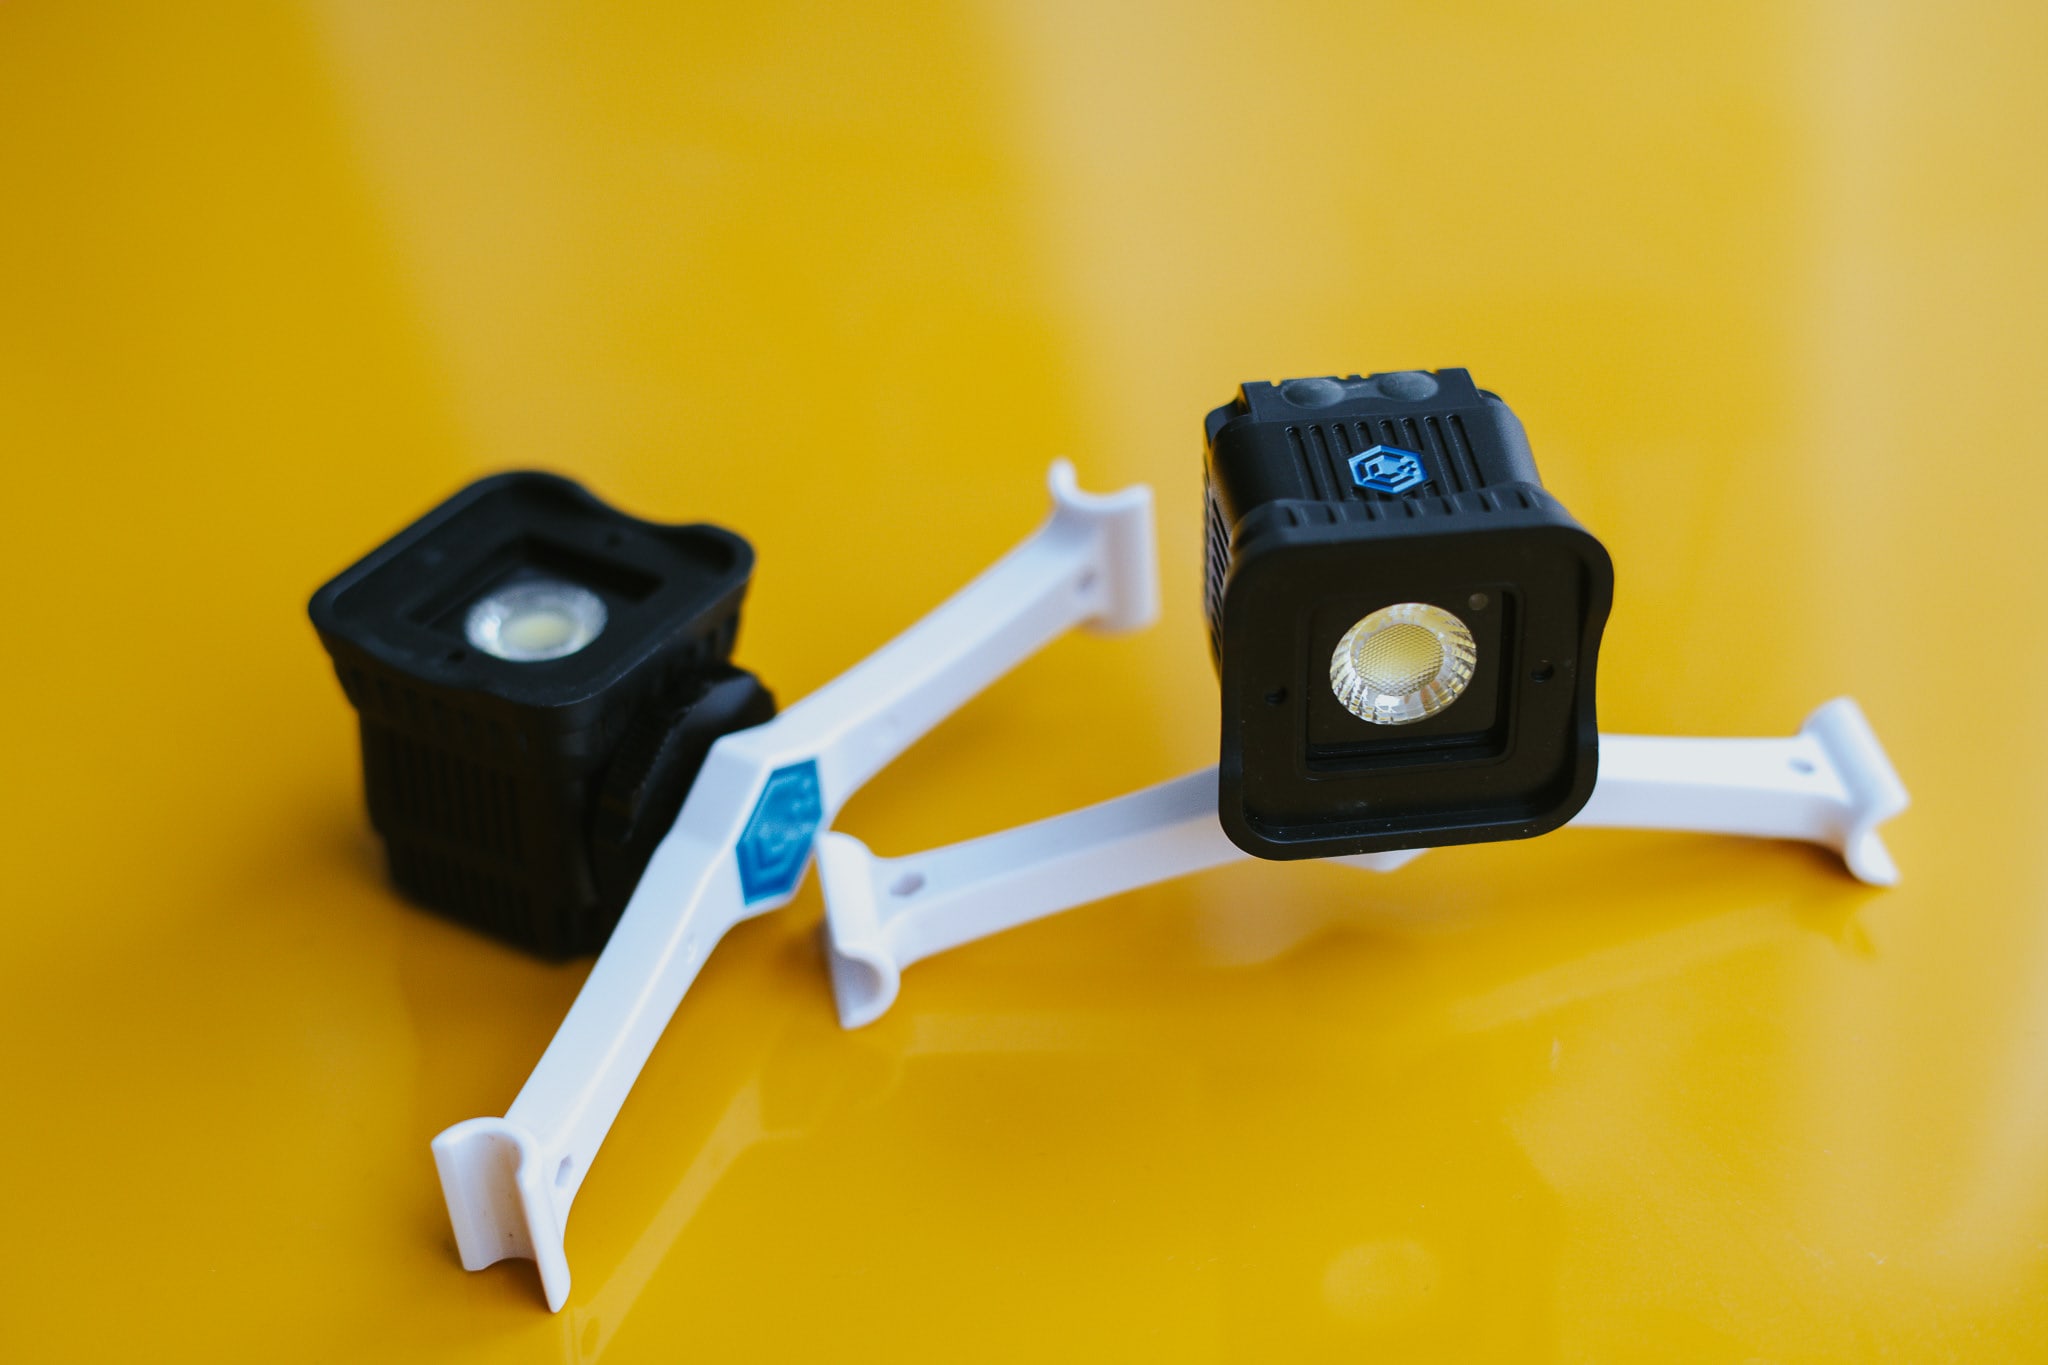
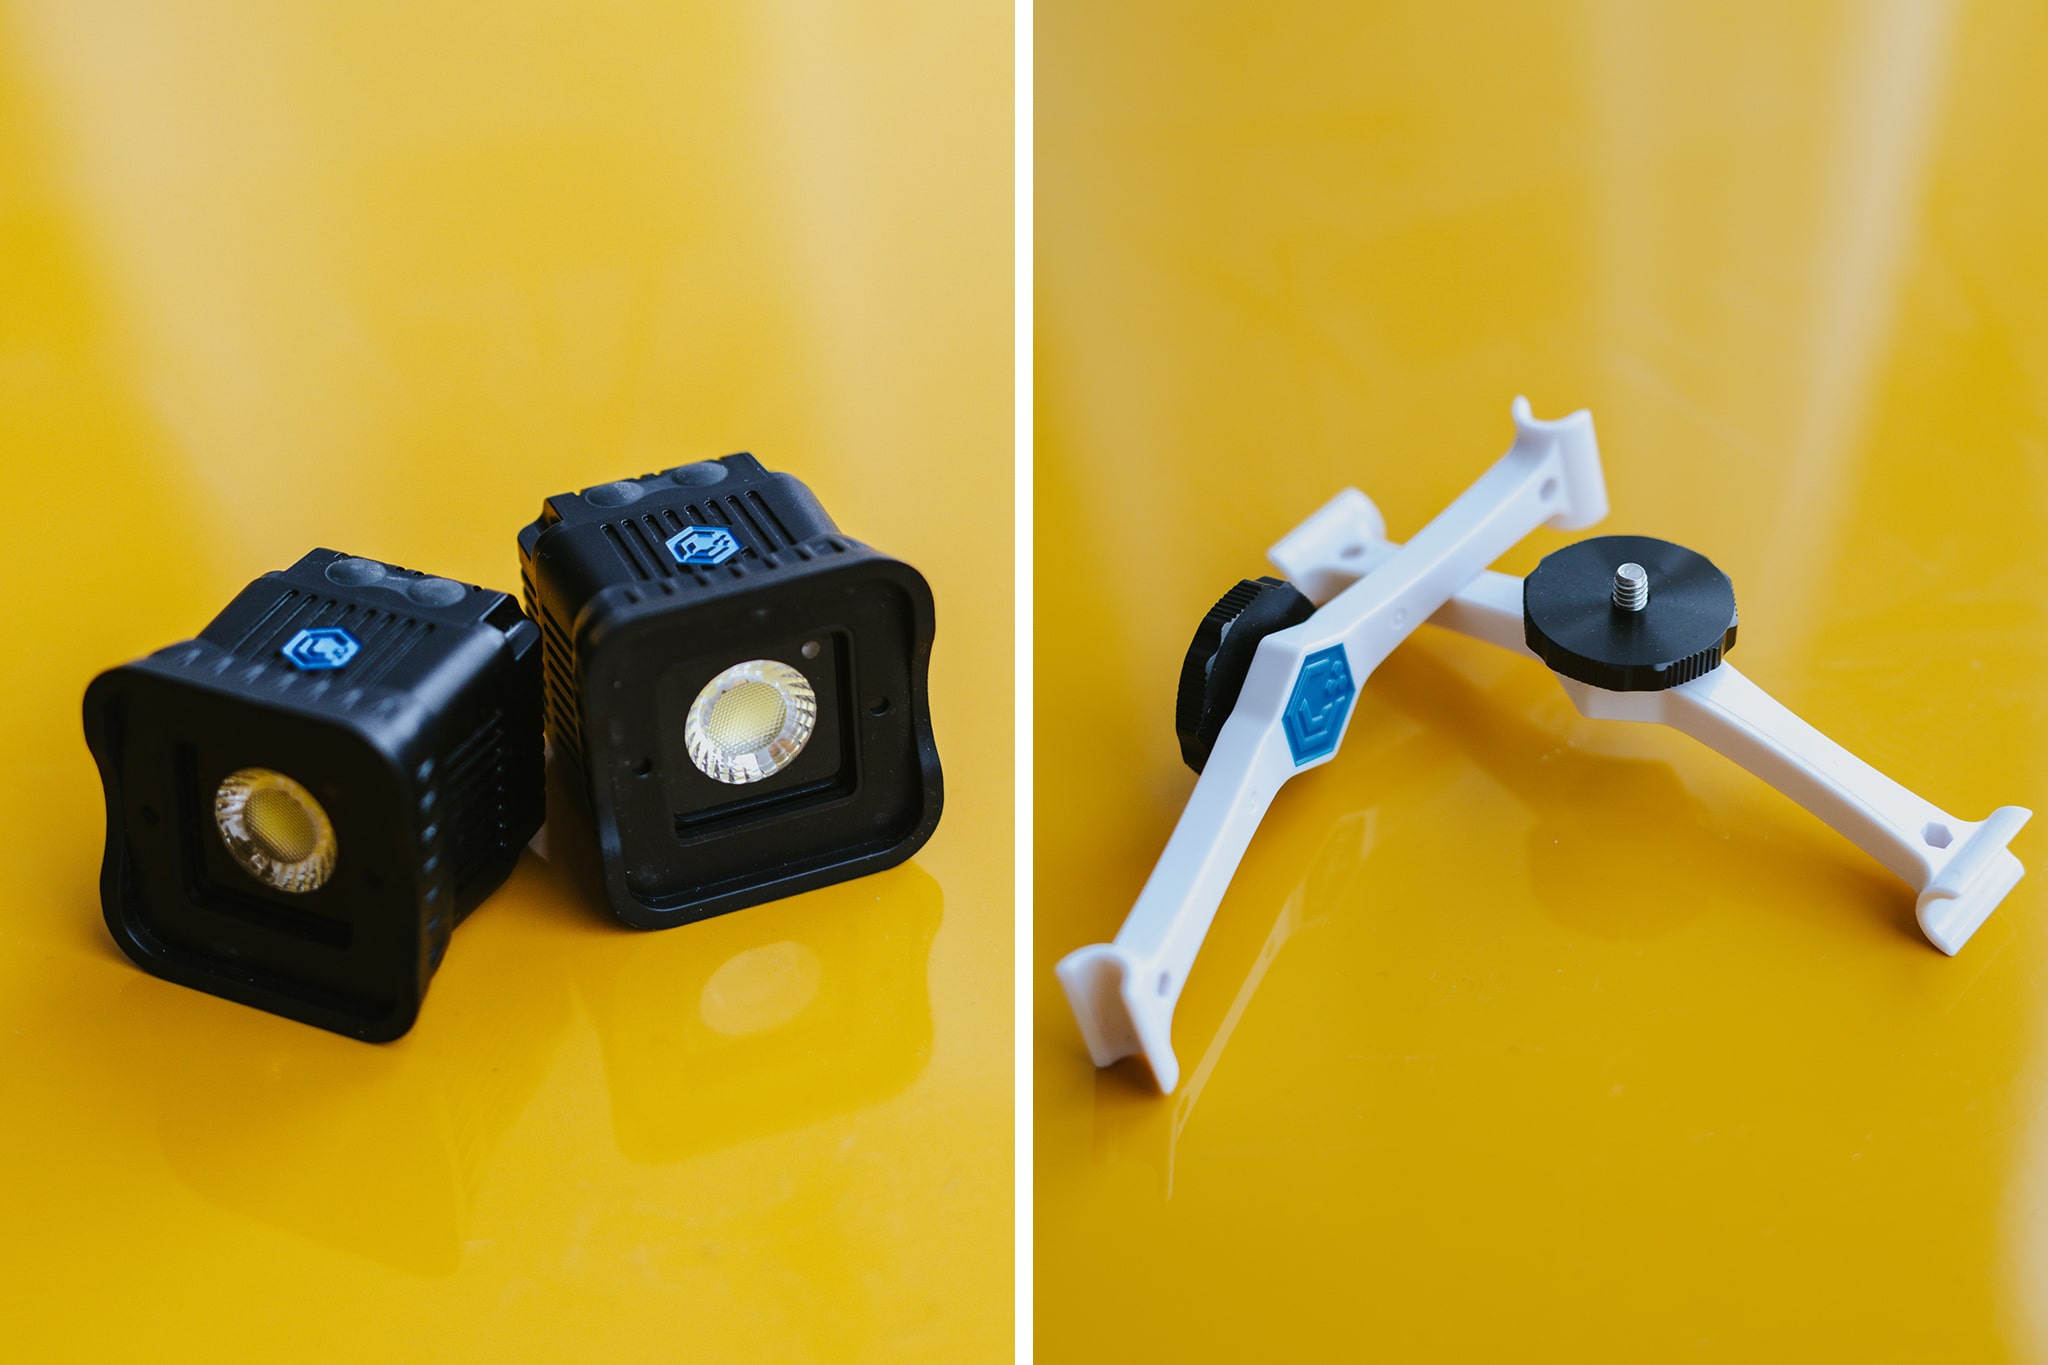
For this specific image, I used 2 Lume Cubes – it is a portable, durable, powerful lights for photo and video devices.
The reason was because I can connect it via bluetooth and change its brightness without touching it – they have an app that is available which makes life much easier.
Other random reasons to invest in them:
They have modifiers (in future scenarios I’ll probably use it to add some color to a backdrop).
It’s ultra bright, portable, charges via usb-a, goes underwater without a housing, and quite durable (I’ve already dropped it).
It’s also just a good flashlight if you need one in case of emergency.
What are things I need to take into consideration when I drone light paint?
Location scouting is important!
For the image, I quickly ran outside at around midnight to take it at a nearby park.
The snow had fallen and there was a fresh patch of snow that I felt like I could use.
Watch out for the moon phases and also the direction at which light will fall on the surface you will be light painting. You can use a combination of moonlight and drone lights when you are painting patterns in the sky (moonlight to illuminate landscape and drone light to paint patterns in the sky) or use the drone lights to fill in light in areas where light is less or not available.
For this image, it was almost full moon. I could walk around and see everything around me.
But this would affect the final image and I knew that that would have to be accommodated into the initial exposure (it helped in the end)
Check to see if you are allowed to fly the drone in the area you wish to shoot.
Please, please, please do this.
Don’t be one of those people who break rules – please don’t fly in National Parks, in cities, etc.
While most images for drones don’t require much height, please double check there are no helicopters flying around.
Be careful of wind.
Luckily this night I went out, there was little to no wind.
The drone would be able to fly in a circle without any issues.
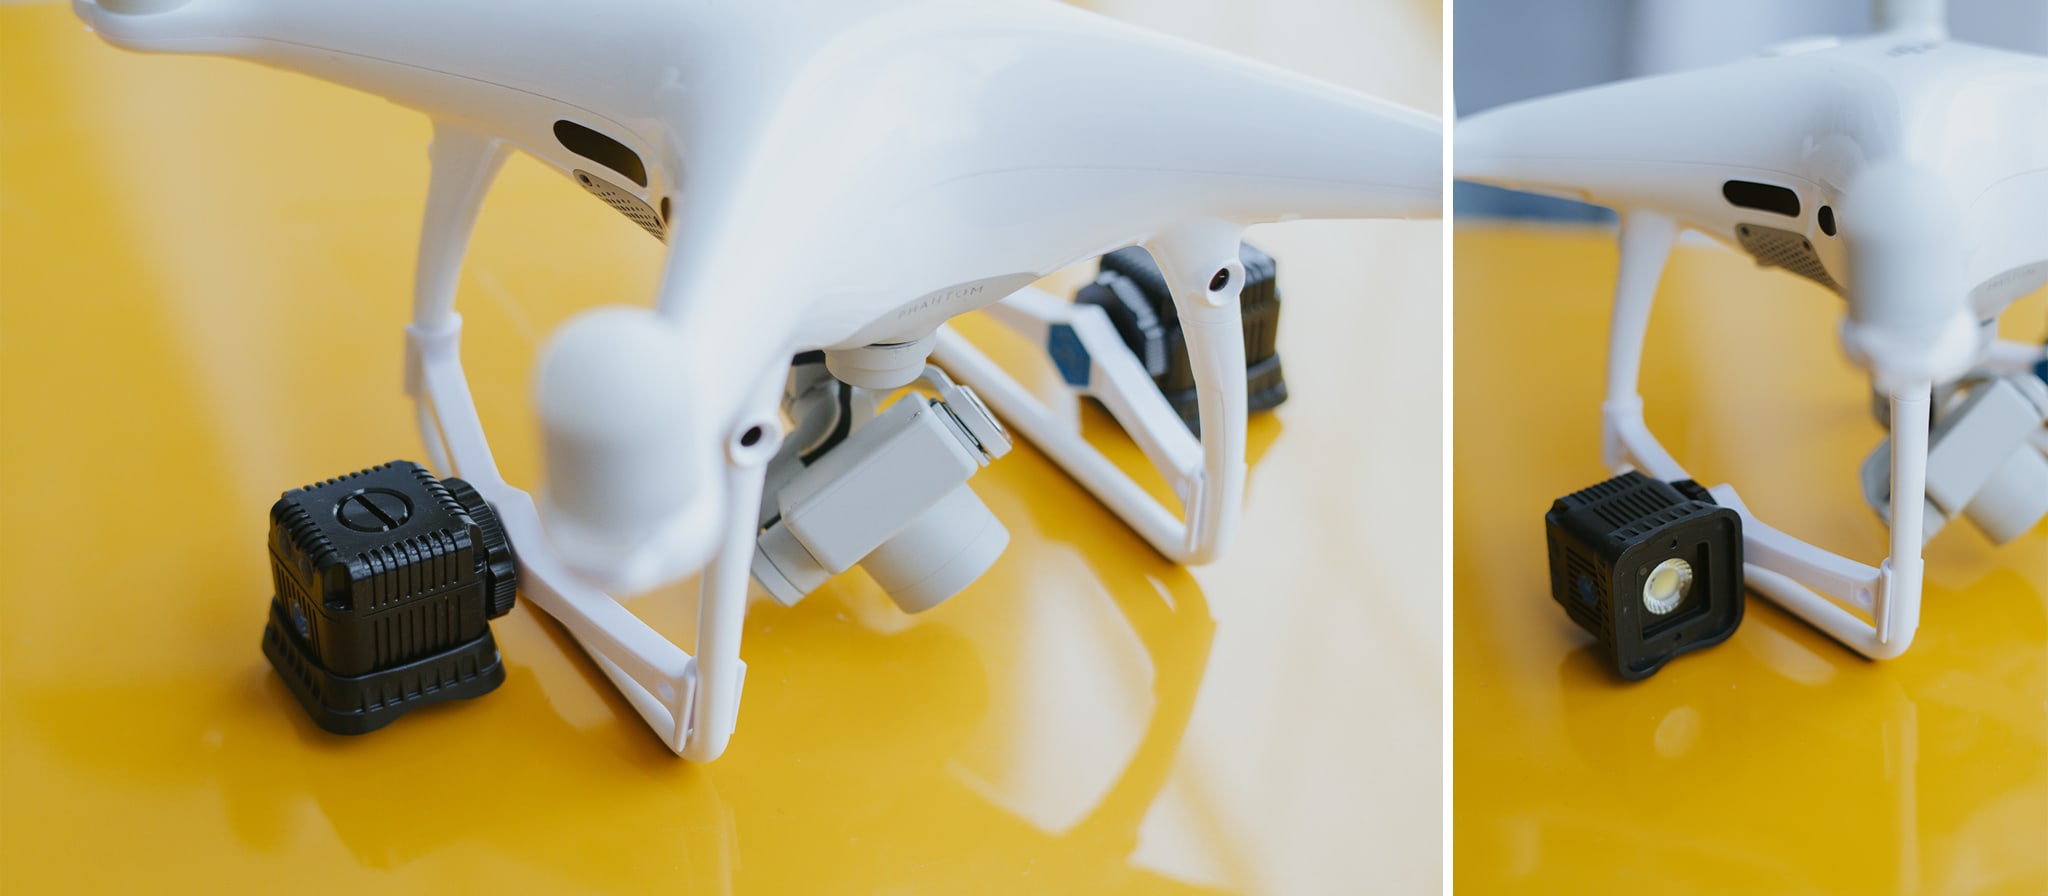
If you have the chance, black tape the attachment accessory to the drone so it doesn’t fall off mid-flight.
Last thing, it’s best to cover the lights on the drone (typically red, green, yellow) or you will see trailing lights.
For this image, I did not cover it.
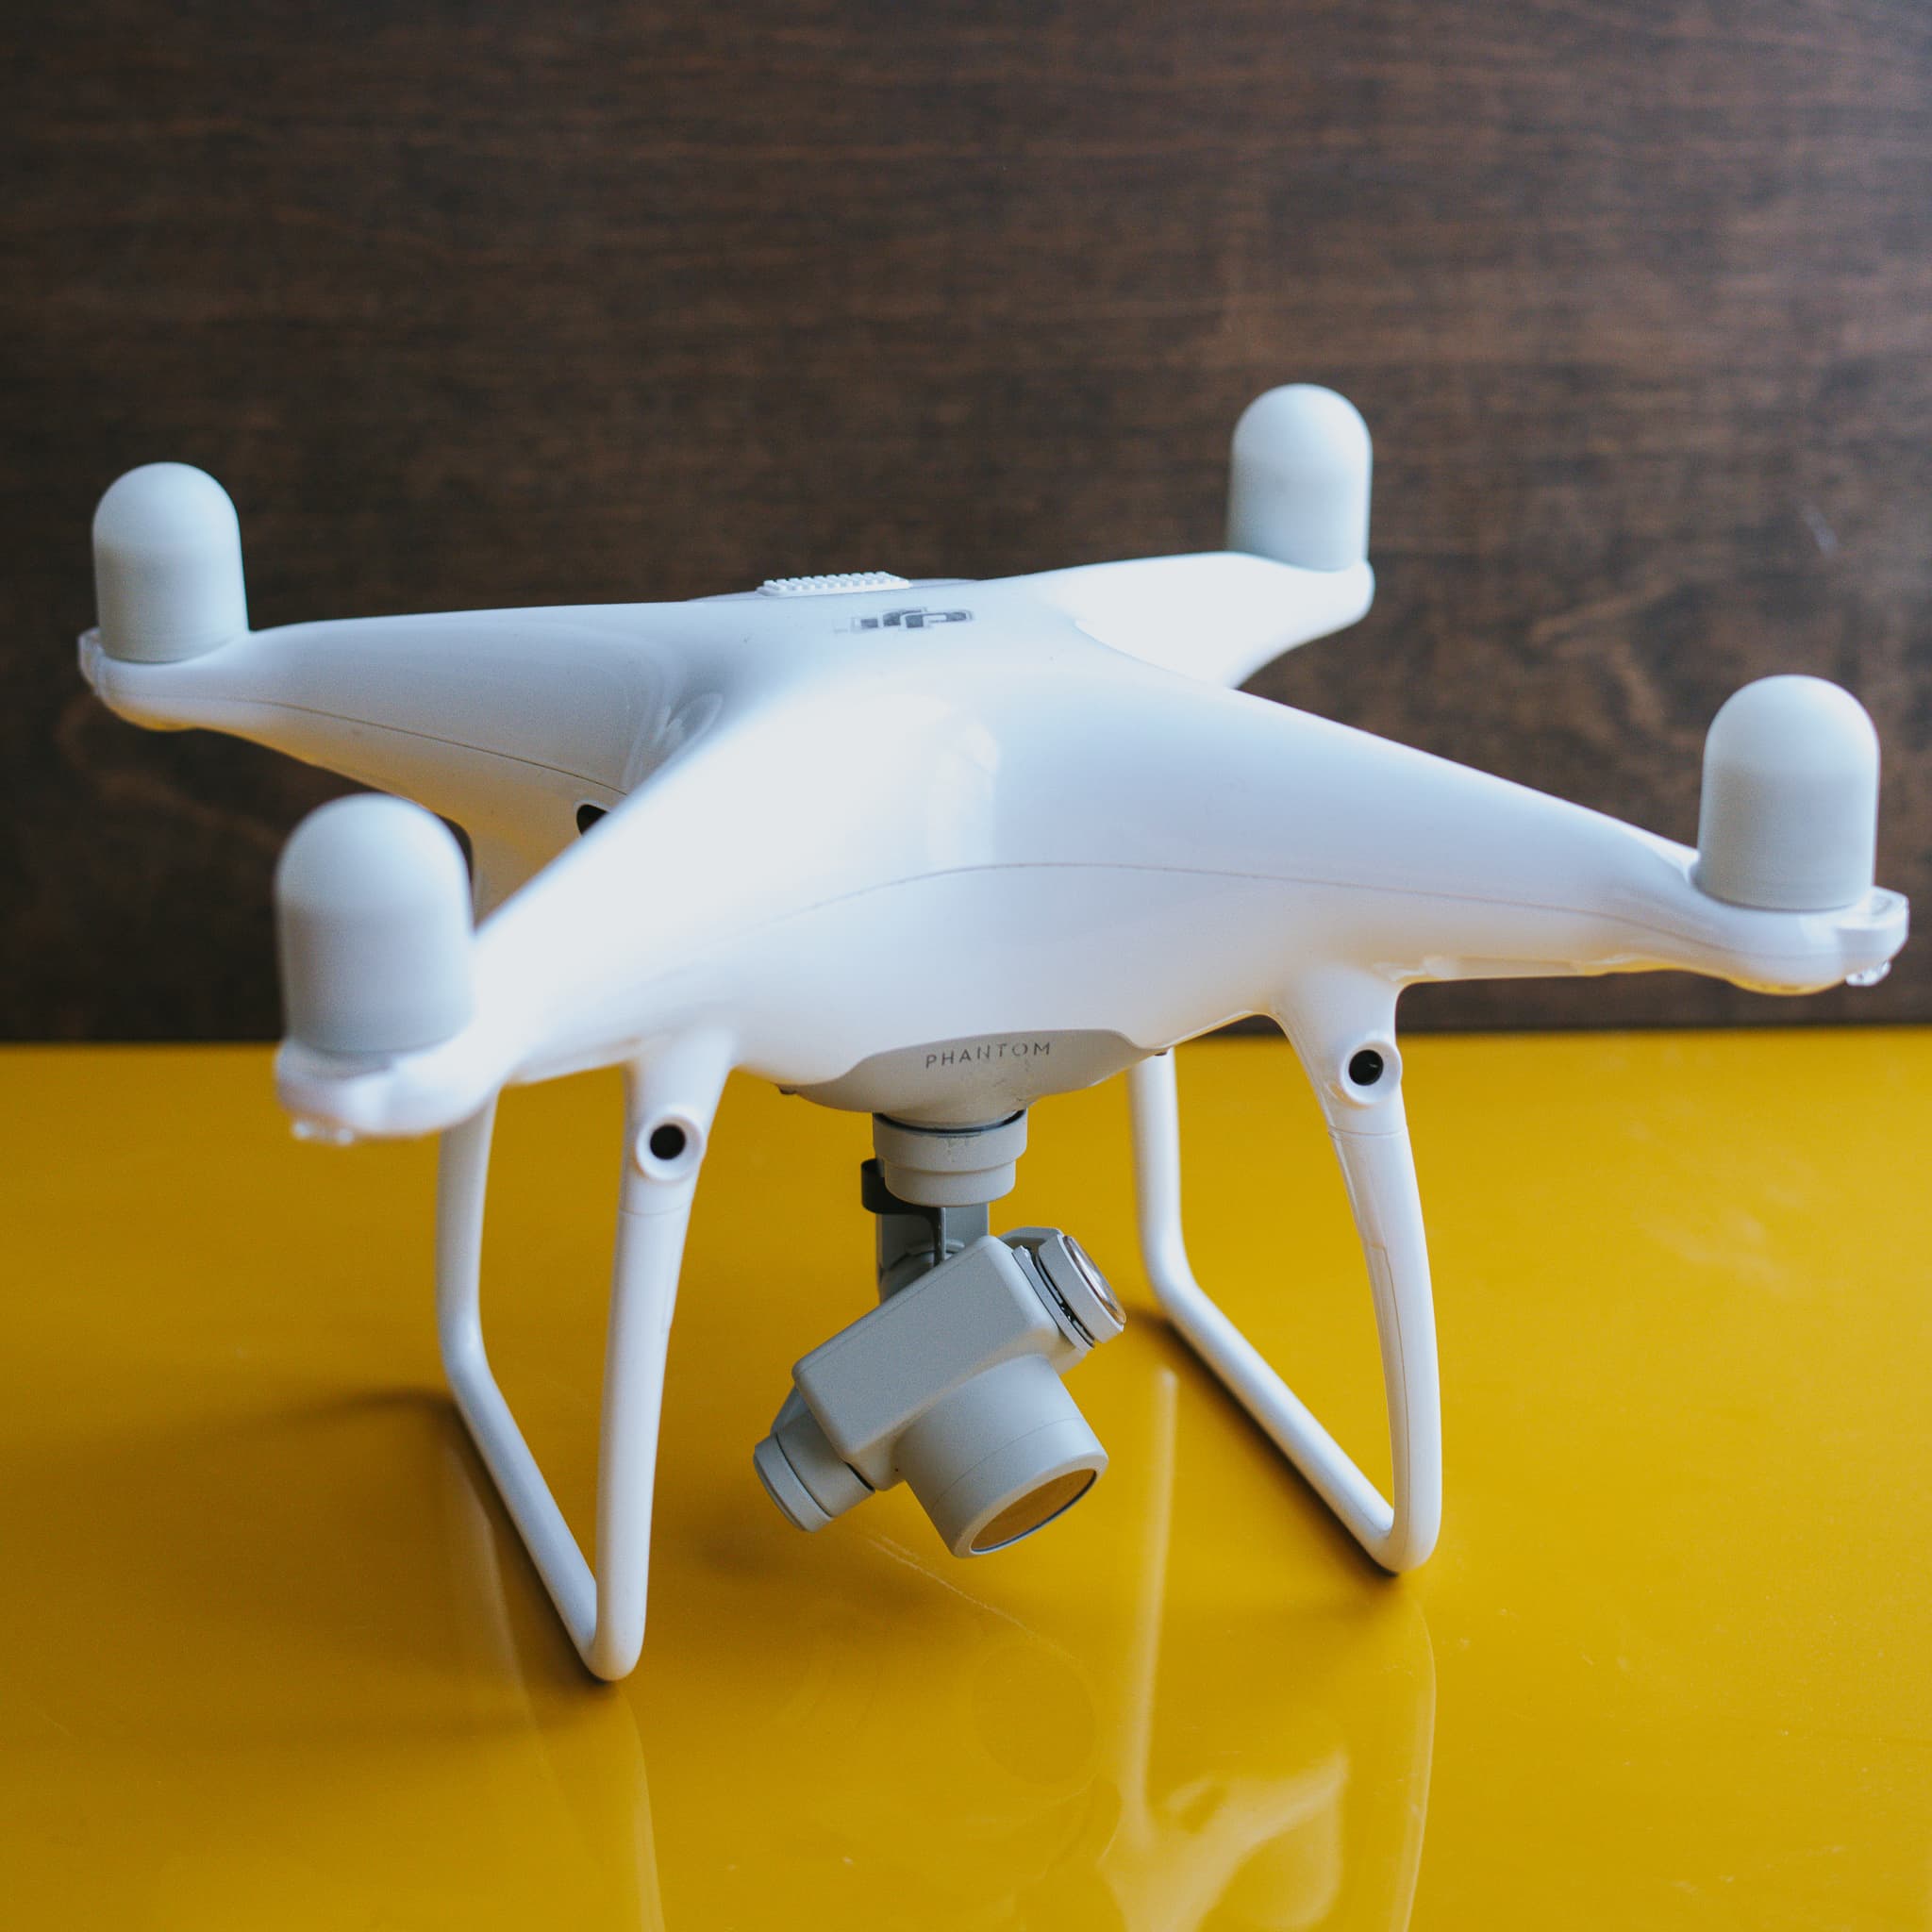
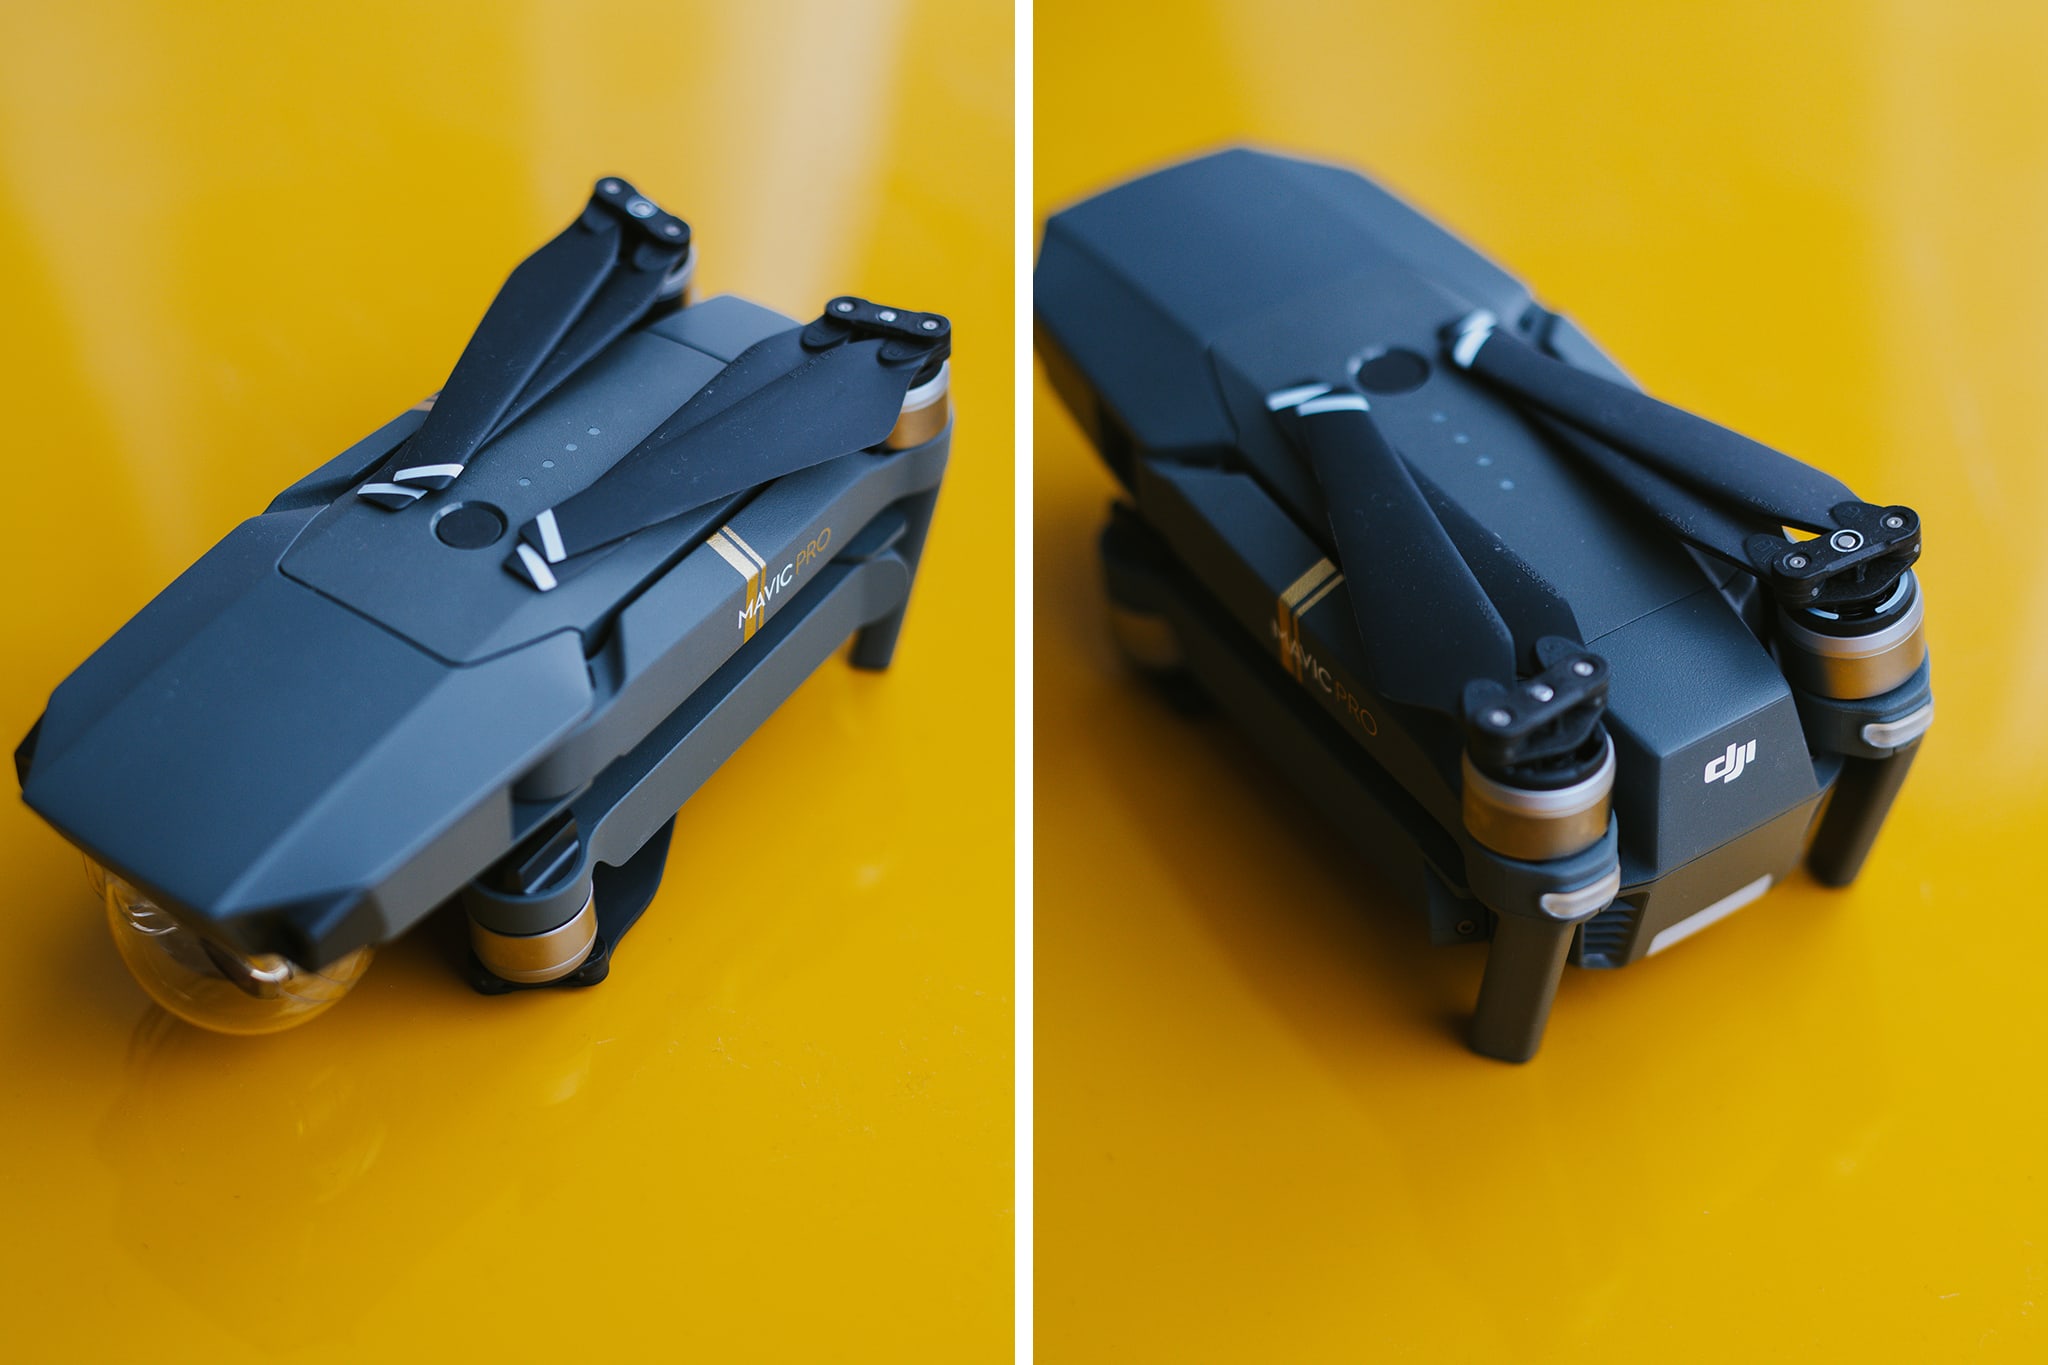
It was a lot more work for the Phantom than it would be for the Mavic.
What apps do I use to help with light painting?
Since you need to be careful about safety and security concerns, unless you’re 100% sure, it is also good to use apps that let you check for information on locations safe to fly a drone, so that you do not get into trouble using the drone.
Airmap for iOS and Android – aeronautical data & services to unmanned aircraft, or drones.
Hover for iOS and Android – this app tells you if it’s safe to fly in your current location.
B4Ufly for iOS and Android – if you live in the US the FAA has produced this app to make it super simple to know where in the US you can and can’t fly your drone.
Litchi for iOS and Android – use the Litchi app for DJI drones and it can help to create patterns in the sky. This app has various flight modes that include Panorama, Orbit me, Follow me, Ground station and Waypoints, VR Mode and Focus. This app helps the drone follow a pre-programmed path perfectly.
What were your camera settings for this long exposure?
I used a Nikon D750 with a Nikon AF-S NIKKOR 14-24mm f/2.8G ED Lens
I wanted to make sure I was able to get the moon in the shot as I felt like it added to the image.
My first couple photographs and exposures were off but generally found that a 20-30 second exposure worked
My initial test did not include the drone lights, so I eventually went with something like this:
15mm – f7.1 – ISO 200 – 20 second exposure.
I used the DJI Phantom 4 and put it in Point of Interest Mode – which does a full orbital rotation.
I don’t recall the two radius distances I used in the mode but the full rotation would equal about 20 seconds.
I had to adjust the speed for both rings to be able to make sure it made the full rotation in time.
I decided to just do a self timer on the camera and run up the hill to get myself in the photo.
Not my brightest idea.
Can we see the before, during, and after the light painting / long exposure photo?
Sure~!
As you can tell, I failed a little bit and there are a few things I would do differently.
But given that it was around 30 degrees outside and it was already 1am by the time I put all my settings up and running I decided to call it a night.
I’ll probably be utilizing this idea later when I’m traveling or for a wedding, so I consider this a good test shot.
This was the initial shot – around 20 second exposure.
It’s a bit underexposed, but I could pull it up in post.
Also, you can see where I climbed the hill – I decided to photoshop that later.
I changed the height of the drone and changed the radius of the orbit to match the 20 second rotation.
I just photoshopped the circle into the first image.
Did a quick exposure adjustment and then photoshopped out my footsteps.
Ta-daaaaaa~!
If you have any further questions, please feel free to contact me!